Studio Apartment Zoning Ideas: Defining Areas Without Walls
A seven-step method for dividing a studio into sleeping, sitting and eating areas with rugs, furniture, light and color, starting with a sketch on paper.
At a glance
- Difficulty
- Easy
- Time
- About 2 to 3 hours, plus a day or two of living with the taped layout
- Best for
- Studios where the bed, sofa and table share one room
- Renter note
- Works with freestanding furniture and rugs; no fixings needed unless you add a curtain track
What you need
- Tape measure
- Squared paper and pencil
- Scissors
- Painter's tape
- One rug per zone
- A plug-in lamp for each zone
In a studio, the bed, the sofa and the place you eat all share one set of walls. Without some kind of order, the room reads as a bedroom with extra furniture in it. Studio apartment zoning is the fix: you give each activity its own clearly marked patch of the room, using rugs, furniture, light and color instead of walls.
The method below works in order, from a sketch on paper to the last lamp. Most of it involves moving things you already own, so you can try a zone for a week and change it if it does not suit how you live.
Step 1: Decide what the room has to do
A studio usually needs three zones: sleeping, sitting and eating. Some also need a desk. Write the list down and be strict about it, because every extra zone makes the others smaller.
Then rank them. The zone you use most during waking hours deserves the best spot, usually near the window. The bed needs darkness and calm more than it needs a view, so it can take the quieter end of the room.
Step 2: Plan it on paper before lifting anything
- Measure the room and sketch it on squared paper, marking the door, the windows, the radiators and the kitchen wall.
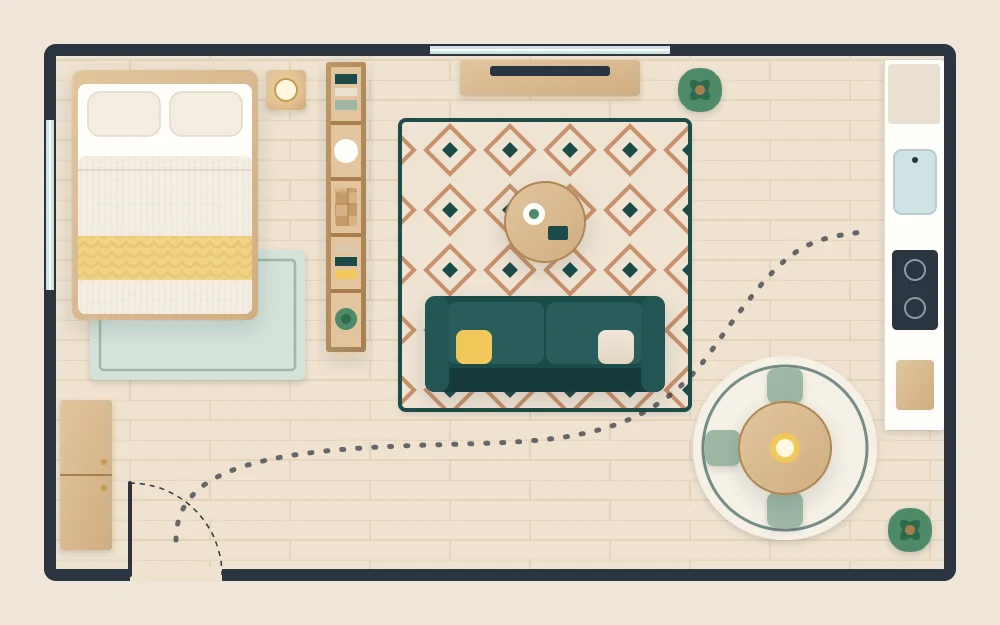
- Draw a line from the front door to the kitchen, the bathroom and the window. These walking paths must stay open, so zones go beside them, not across them.
- Cut paper shapes for the bed, the sofa and the table at the same scale, and slide them around until each zone has a clear edge.
- Mark the favorite arrangement on the real floor with painter’s tape and walk through it for a day.
The general principles for where large pieces sit, such as keeping tall furniture toward the edges, are covered in the guide to furniture placement in tight rooms.
Step 3: Turn the bed out of the first view
Stand at the front door. Whatever you see first sets the tone for the whole apartment, and a full view of the bed makes the studio feel like a bedroom. Try to place the bed so the door opens onto the sitting area instead.
Common options are the corner farthest from the door, an alcove if you have one, or the wall behind the door swing. Where the bed has to stay in view, turn it so you see its side or foot, not the pillows, and dress it like a daybed during the day with a tailored cover and a row of cushions along the wall.
Step 4: Draw the edges with a rug per zone
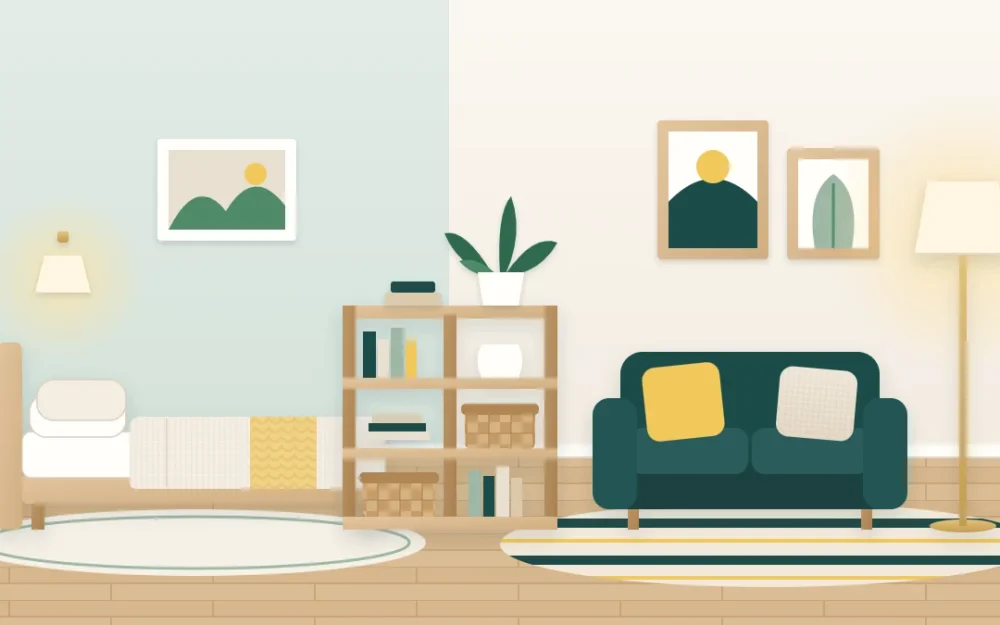
A rug is the simplest boundary there is. The sitting zone ends where its rug ends, and everyone reads it that way without being told. Give the sofa area one rug large enough for at least the front legs of the seating; the rug size guide explains how to choose it.
A second, smaller rug beside or partly under the bed marks the sleeping zone. Leave a strip of bare floor between the two, about 12 to 18 in (30 to 45 cm) as a loose starting point, so they look like two islands and not one patchwork. The dining spot often looks best with no rug at all, which keeps the floor from feeling carved up.
Step 5: Add one divider, and keep it light
A divider gives the bed some privacy and the sofa something to back onto. In a small room, pick one and let light pass through or over it.
| Divider | What it does | Best when |
|---|---|---|
| Back of the sofa | Makes a low edge without blocking any light | The sofa can face away from the bed |
| Open bookcase | Screens the bed partly while light passes through the shelves | You have floor depth to spare beside the bed |
| Curtain on a ceiling track or tension rod | Closes the bed off at night, disappears by day | The bed sits in an alcove or corner |
| Folding screen | Hides the bed from the door, moves in seconds | You want to try a divider before committing |
A low bookcase, around the height of the sofa back, screens a bed from a seated person and still lets you see the window across the top.
Good to know
A freestanding divider must be stable. Follow the maker’s guidance on securing tall furniture, keep heavier items on the lower shelves, and do not stand a tall, narrow unit where it can be knocked from either side. If a curtain track or any other fitting has to be fixed to a wall or ceiling, choose the hardware for the wall type and the weight it will carry, follow the manufacturer instructions, and check your lease or ask before making changes.
Step 6: Give each zone its own light
One ceiling light flattens a studio into a single space again. A lamp in each zone does the opposite: switch on only the lamp by the sofa and the bed fades into the background.
Plan on one plug-in light per zone: a floor lamp beside the sofa, a clamp light by the bed, and a lamp near the table.
Step 7: Shift the wall treatment, keep the palette
Walls can mark zones too. Behind the bed, try one large calm piece, a textile hanging or a painted panel. Behind the sofa, a pair of prints or a picture ledge. Changing the style of what hangs on the wall is enough of a signal that one area has ended and another has begun.
What should not change is the palette. Use the same base color and the same two or three accents in every zone, so a cushion on the sofa echoes the throw on the bed. Zones separate the room; the shared colors hold it together. That second half of the job, making the areas relate, is the subject of the guide to decorating an open room so it feels connected.
If you also need a desk
A fourth zone is the hardest to fit. Tuck the desk beside the bookcase divider, at the end of the kitchen counter, or along the window wall, and give it its own lamp. Where the only space is next to the bed, the ideas in the bedroom and office combination guide show how to keep work out of sight when the day is over.
Frequently asked questions
How do I separate the bed from the living area in a studio?
Start by moving the bed out of the direct view from the front door, then mark the sleeping area with its own small rug and one light divider, such as a low open bookcase, a folding screen or a curtain. Keep the divider low or open so daylight still reaches both sides of the room.
Do room dividers make a studio feel smaller?
A solid, tall divider can make both halves feel boxed in. An open bookcase, a low unit at sofa-back height or a curtain that draws fully aside usually keeps the room reading as one airy space while still giving the bed some privacy. Use one divider only, and let light pass through or over it.
How many zones can a studio have?
Three is a comfortable number for most studios: sleeping, sitting and eating. A fourth zone for a desk is possible when it shares an edge with another, for example at the end of a counter or beside a bookcase. If the room feels chopped up, merge two activities into one area.